

Whiteout Survival Furnace & Furnace Upgrade Requirements
Whiteout Survival Switching States

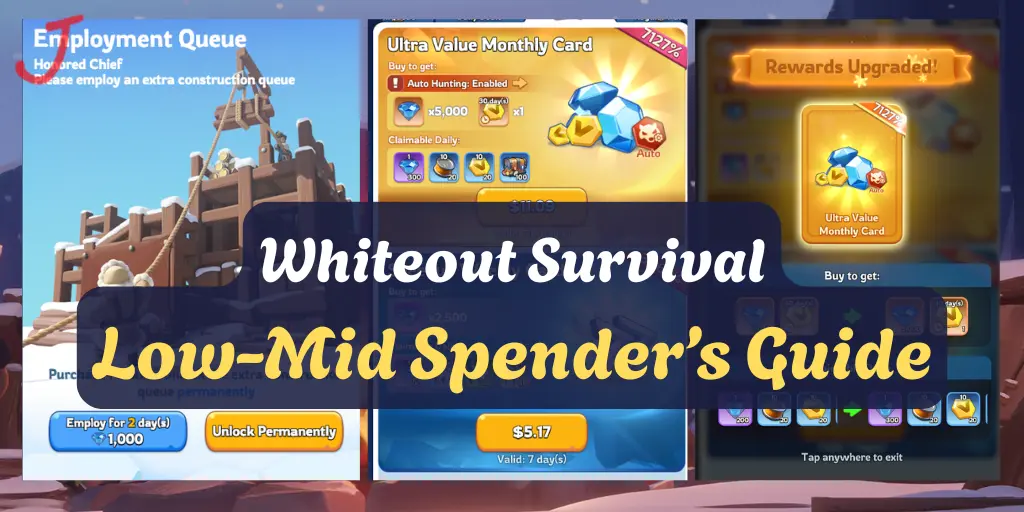
Whiteout Survival Low to Mid Spender's Guide
This guide is designed specifically for low to mid spenders who want to get the most out of Whiteout Survival and is crafted with insights from Rednevi. Focus on balancing growth, combat strength, and resource efficiency. Inside, you’ll find clear advice on what to build and research first, which packs and events offer the best value, and how to avoid common pitfalls. Every section is packed with practical, easy-to-follow tips to help you stay competitive without overspending.
Let’s get started and try not to break the bank!
🔧 1. Research and Building Priorities (Simplified & Effective for Low Spenders)
If you're a low spender, your main goal should be efficient progression—gaining power quickly without wasting time or resources. To do that, prioritize upgrades that boost speed and resource output early on.
🔬 Research First
Focus your Research Center on the Growth and Economy trees:
In Growth, prioritize Tool Enhancement (for faster research) and Tooling Up (for faster construction). These speed boosts make all future upgrades quicker.
Unlock Camp Expansion (larger training batches) and Trainer Tools (faster troop training) early.
In Economy, invest in Resource Output and Gathering Speed upgrades for all major resources (Wood, Food, Coal, Iron).
Hold off on most Battle research until your core economy is built—only grab essentials like Regimental Expansion (march size) when needed.
🏗️ Building Strategy
Avoid trying to max out every building at each HQ level. Instead:
Rush your Furnace (HQ) to at least Level 30, which unlocks powerful features like T10 troops, Chief Gear, Chief Charms, and the Beast Cage.
Hitting Furnace 26, unlocks a few key items such as Chief Gear, Chief Charms, and the Beast Cage.
🛠️ Smart Upgrade Order
Embassy – Often a requirement for HQ upgrades.
Resource Buildings – Keep these growing to fuel everything else.
Military Camps – Infantry, Rider, and Marksman camps for training troops.
Research Center – Unlocks better tech tiers.
Command Center – Increases your march and rally capacity.
Non-essential buildings like decoration or low-level infirmaries can wait.
🚧 Use Two Builders
If you're spending anything, the 2nd construction queue is your best value. Unlock it early with gems or permanently if available. Assign:
One builder to HQ progression and prerequisites
The other to resource buildings (aim for level 20+ across the board)
This keeps your growth steady and sustainable.
⚖️ Keep Research & HQ in Sync
Don’t let your Furnace outpace your Research Center. Each Research Center level unlocks vital tech, so:
Finish all cost-effective research at your current level before upgrading.
Meanwhile, upgrade your troop camps and Command Center so you're not held back by training capacity or march size.
📈 Why It Matters
Following this strategy builds a strong foundation that snowballs over time:
Early speed upgrades reduce future costs and build times.
Furnace 26 gives you access to powerful troops and gear, making you much stronger even without spending heavily.
Focusing on high-impact upgrades ensures every minute and resource counts.
Stick to this path and you'll stay competitive—even against big spenders.
📊 2. Stat Prioritization: Focus Your Strength Where It Counts
Not all troops—or stats—offer equal value. To get the most from your gear, tech, and upgrades, focus on the units and stats that deliver the biggest impact.
✅ Troop Type Priorities
Infantry comes first. They’re your frontline tanks, absorbing damage and protecting your damage dealers. Boosting infantry HP and defense keeps your whole army alive longer.
Marksmen are your primary damage dealers. Prioritize attack and lethality stats to maximize their killing power.
Riders (Lancers) are situational. They’re useful in specific roles (e.g., flanking or PvE), but generally lower priority. Focus on them after your infantry and marksman upgrades are solid.
PvP Rally Tip: Many alliances prefer a 50% Infantry, 30% Marksmen, 20% Lancer composition to ensure a strong frontline. Upgrade research and gear accordingly—start with infantry and marksmen, not lancers.
🧠 Stat Type Priorities
Lethality is king. It increases how effectively your troops kill enemies by reducing how much HP they need to cut through. Especially valuable in PvP and boss fights.
Attack is next. It directly increases damage output and works hand-in-hand with lethality.
Once your damage stats are strong, build up Defense and HP to reduce losses in sustained fights.
Summary Rule: Maximize damage first (Lethality > Attack), then layer in durability (Defense > HP) to sustain your advantage.
💡 Why Infantry First?
Infantry has more accessible defensive bonuses and forms the backbone of your army. Strengthening them gives the highest survivability return. Marksmen, on the other hand, offer the best DPS, especially in events like Bear Hunt (where 100% marksmen are often used). Riders are versatile but less essential, so prioritize them last.
🛠️ Research & Gear Tips
In research, unlock infantry defense/HP and marksman attack/lethality early.
For gear and charms, favor pieces that boost lethality or attack—they offer the fastest combat power gains.
When upgrading exclusive hero gear, use resources (like widgets) on top infantry or DPS heroes, not secondary roles like lancers.
Always read stat descriptions. Lethality = more kills, while Attack = more damage—both are important, but lethality often gives better returns, especially early on.
Whiteout Survival Pro Tip:
If you have to choose between +X% attack and +X% lethality on a charm or gear piece, go with lethality for a stronger overall impact.
💎 3. Best Long-Term Purchases (Evergreen Investments)
If you’re spending real money in Whiteout Survival, focus on items that retain value over time—“evergreen” purchases that continue to benefit your account through every update and stage of the game.
🛡️ Chief Gear Sets (Top Priority)
Chief Gear is one of the most valuable long-term investments you can make. Crafted with scrolls, these pieces boost core troop stats across the board—regardless of which heroes or formations you use.
Bonuses from Chief Gear are universal and permanent (e.g. +troop attack, HP), meaning they never go out of style.
Events like Artisan’s Trove often offer hundreds of scrolls for $5–$20, making gear upgrades affordable over time.
Aim to build a full Mythic Chief Gear set, as this continues to scale with your progression—unlike hero-specific gear that may become outdated.
💠 Essence Stones (For Mythic Hero Gear)
Essence Stones are used to enhance Mythic (gold) hero gear, which is considered endgame equipment.
Once you unlock mythic gear from events, Essence Stones let you upgrade stars/levels, often doubling a hero’s combat impact.
They remain useful across all hero generations and never expire.
Look for events like Mia’s Fortune, which often includes Essence Stones as a reward choice.
🔮 Chief Charms
Chief Charms offer permanent stat boosts (especially HP and lethality) and are tied to your Chief, not individual heroes.
They enhance any troop composition and remain relevant at every stage of the game.
Charm materials are rarer, so grab them when they appear in good packs or event rewards.
Prioritize charms that align with top stat goals—lethality, HP, and attack.
- Important Note: Chief Gear is more important than Chief Charms.
🔥 Fire Crystals (Endgame Progression)
Fire Crystals are required for entering the Fire Age and upgrading buildings beyond T10.
Absolutely essential for unlocking late-game troops and city upgrades.
Nothing replaces Fire Crystals—they’re a hard progression gate, so investing early avoids late-game roadblocks.
Packs and milestone events often include Fire Crystals or Fire Crystal Chests—grab them when available, even if you’re not there yet.
🔥 Refined Fire Crystals
Refined Fire Crystals are the last resource required at the moment. This will take you beyond FC5 and end game mechanics.
🎯 Selective Hero Currencies
Some hero-related items are smart long-term picks—if chosen carefully:
Generic Mythic Hero Shards are universally useful and allow you to upgrade any meta hero you unlock in the future.
Widgets (used for exclusive hero gear upgrades) are valuable but rare—only invest in these if you’re focused on maxing out a key hero.
Avoid spending heavily on specific hero shards unless you're sure they’ll stay relevant.
Look for broad-use currencies like Hero Tokens, Hero Choice Chests, or Universal Shards—these let you adapt as new heroes are released.
🧰 Permanent Utilities & Boosts
Certain one-time purchases provide lifelong benefits:
Second Build Queue – A must-have for low spenders if you didn’t unlock it with gems.
VIP Levels – Boost passive perks like troop stats and resource speed. Look for VIP cards or monthly packs that provide points over time—these offer far more value than buying VIP points outright.
Unlockable Features – Occasionally, you can unlock additional gameplay functions (like Daybreak Island, extra tech slots, or pet features) via purchases. If these give ongoing stat or resource boosts, they can be worthwhile.
🚫 What to Avoid
Skip these short-term, low-value purchases:
Speed-up packs and resource bundles – You’ll earn plenty through gameplay and events.
Hero-specific upgrade packs – Heroes rotate fast, and meta shifts make these risky investments.
Basic store packs – If they don’t include gear scrolls, charms, essence stones, or other evergreen currencies, skip them.
Golden Rule: Choose items that build lasting power. A $5 pack of speed-ups disappears in minutes—but a gear or charm upgrade lasts forever.
🧠 4. Growth Optimization Tips
Smart resource management separates casual spenders from top-performing players. Stretch your dollars by maximizing the value of every action in-game.
⏱️ Use Speed-Ups Strategically
Don’t burn speed-ups as soon as you get them. Instead, save and deploy them during events that offer rewards for construction, research, or training.
Events like City Development, Power Up, or Troop Training often give points for actions you'd do anyway.
Use your saved speed-ups during these to “double dip”—gain power and earn rewards like gems, hero shards, and gear mats.
Key tip from Reddit: “Speed-ups are only useful if you have the resources to go with them.” Always farm or gather enough before using them.
For example, if your building upgrade finishes but you lack resources to start the next one, your speed-up loses value. Plan ahead.
📅 Stack Events for Maximum Rewards
Plan your growth bursts around high-value recurring events.
Weekly events like Hall of Chiefs (HoC) reward all core growth activities: building, training, and research.
Monthly or server-wide events like State vs. State (SvS) often have stages where using speed-ups or upgrading troops/buildings earns big points.
The goal: maximize your return on effort. Never use major resources on an off-day.
Patience = progress. Low spenders can outperform whales by syncing actions with rewards. This is a long-term win strategy.
⚔️ Know When to Pivot to Battle Tech
While early focus should be on economic tech (gathering, building, resource boosts), you’ll eventually need combat readiness.
Before a big war event (e.g., your first SvS), shift focus to military research: troop HP, attack, defense, march capacity.
Time major combat upgrades to align with Kill Events or War Prep stages for maximum point gain.
Around Furnace level 25+, start alternating: one economic tech, one battle tech.
You don’t want powerful T8+ troops with no research support—balanced growth is key.
🤝 Leverage Alliance and Daily Systems
Growth isn’t just solo. Make full use of alliance systems and daily routines:
Stay in an active alliance: gain construction and research speed buffs, alliance helps, and access to team events.
Donate to Alliance Tech to unlock passive stat boosts.
Coordinate donation and speed-up timing with your alliance to stretch growth during big events.
Complete daily quests, join Alliance Throwdown, and hit event milestones for free speed-ups, gems, and mats.
These “small” gains stack fast—and cost you nothing.
🧭 Plan Ahead & Don’t Waste Items
Think like a strategist, not a spender.
Keep a weekly build/upgrade plan. Know what resources you’ll need in advance and gather accordingly.
Avoid wasting gems on resources—use them for high-value perks like extra builders, VIP, or event spins.
Hold onto rare items (e.g., +50% troop attack boosts or Fortune Tokens) for major PvP battles or event milestones.
For instance, Mia’s Fortune gives extra rewards at 20, 100, and 250 tokens. Don’t trickle-spin—save for the milestone.
✅ Summary: The Low-Spender Mindset
Always get something back when you spend.
Delay gratification to align actions with rewards.
Invest time in planning so you don’t waste premium items.
Use alliances and events to multiply growth.
With the right approach, even low spenders can snowball into serious power. 💪
🎁 5. Best Value Packages to Buy (for Low Spenders)
💡 Not all packs are must-buys — this is a value menu. Only spend what fits your budget and goals.
If you’re spending money in Whiteout Survival, every dollar counts. The best strategy for low spenders is to focus on packs that give high long-term value — especially during events. Below is a curated list of top-performing bundles, ranked by community feedback and efficiency:
🔄 Daily/Weekly Subscriptions (Best Long-Term Value)
Weekly Benefit Card & Ultra Monthly Card
These offer consistent daily rewards (stamina, VIP points, speed-ups, or gems) at a low price.Ultra Monthly Card provides stamina for farming + VIP points for permanent perks.
Far more efficient than one-time gem or resource purchases.
Great for steady growth without big upfront costs.
💡 Pro tip: Stack subscription packs with events like Hall of Chiefs to double-dip on rewards.
🔥 Event-Limited Packs (High ROI During Events)
Wishful Emporium
Frequently cited as the best deal in the game. Usually appears post-State vs. State.
Offers top-tier items (hero shards, gear mats) at 3000%+ value. A must-buy if it fits your budget.Myriad Bazaar
Another excellent event-limited bundle with discounted upgrade materials.Always prioritize packs marked 3000%+ value.
Avoid anything below 2000% — those are regular bait packs.
Customizable Packs (Mix & Match / Dawn Market)
These allow you to pick your rewards. Always choose high-impact materials (gear, essence, crystals) over boosts or common resources.
🛡 Chief Gear Bundles (Long-Term Power Gains)
Artisan’s Trove and similar packs often include hundreds of gear scrolls.
Even the $5 tier gives great value.
Enables crafting permanent stat-boosting gear — a worthwhile investment over temporary buffs.
Look for mentions of “Chief Gear” or “Charm” in packs and events.
⚡ Essential Early Game Packs
30-Day Stamina Supply (around $4.99, often with coupon)
Daily stamina = more farming, more events, more progression. A strong buy if you’re active daily.Construction Booster Pack
One-time early-game bundle with speed-ups and resources for HQ push.Helps skip the slow grind without needing to buy raw speed-ups later.
🐚 Silver Shell Packs (Festival/Event Currency)
Found in event bundles like Banquet Stall or holiday specials.
Shells are saved up and redeemed for skins, essence, or rare items.
Packs that include Silver Shells + milestone rewards offer serious long-term payoff.
Many players consider these packs “must-buys” if spending at all.
🎯 Lucky Wheel Events (Smart Hero Investment)
Not a direct pack, but a gem-efficient event to obtain Mythic heroes.
Save gems and only spin when you can reach 120 spins (to unlock all shard milestones).
Occasional small purchase promos (e.g. $0.99 token packs) can help you hit the 120-spin target.
Over time, this method can unlock and upgrade a hero without spending $100+ on direct packs.
🎣 Fishing Tournament Pass
Cheap monthly pass (usually under $10) tied to the Fishing Tournament.
Grants extra rewards, event points, and fishing tools.
Helps secure top-tier rewards like Furnace skins and Avatar frames (with stat boosts).
Ideal for low spenders who enjoy this event and want efficient progression.
📦 Other Noteworthy Deals
Hall of Heroes Valor Packs – Buy if it helps push you into higher reward tiers.
Hero Rally / Pet Packs – Optional, only if you need specific items and the value is high.
Mixed Bundles – If well-priced and include multiple core growth items (gear, essence, shards), they’re solid picks. Just avoid packs with filler items you won’t use.
✅ TL;DR – Buying Tips for Low Spenders:
Aim for 3000%+ value packs with permanent growth items (gear mats, shards, crystals).
Avoid basic resource or speed-up packs — you can farm those.
Be patient — top deals rotate monthly. Save for high-value bundles instead of impulse buys.
Plan purchases around events (HoC, SvS, Wishful Emporium) for bonus rewards.
Smart, selective spending allows low spenders to stay competitive — and even outpace impatient whales who overspend on poor-value bundles.
💰 6. Event Spending Strategy
Major events in Whiteout Survival offer huge chances to boost your progress—if you spend or save smartly. Here’s how to maximize returns during key events:
❄️ Frosty Fortune (Treasure Hunt & Enigma Shop)
Open chests with Gems of Enigma earned by daily tasks to unlock milestones with great rewards (Mythic Hero Shards, Widgets, etc.).
Buy just enough Gem packs to open all chests daily—usually a small spend (~$1–$3).
In the Emporium: Prioritize Essence Stones, Widgets, Pet Chests, and Fire Crystals for real power gains. Skip skins unless you have plenty of tokens or the skin bonus is substantial.
Progress carries over across event cycles, so no rush to spend big for skins immediately.
🔄 Tundra Trading Station (Shard Exchange)
Exchange surplus items (extra hero shards, widgets) for Trade Vouchers, then buy valuable items from the shop.
This event requires no spending—just smart use of your inventory.
Prioritize Fire Crystals, rare hero shards, VIP points, and gear mats over fillers like speed-ups.
Avoid buying packs that give Trade Vouchers unless you’re just short of a big reward.
⚔️ Other Events – Quick Tips
State of Power (SvS): Wait for Wishful Emporium post-SvS for best pack deals. Use speed-ups saved from event phases, and avoid unnecessary war speed-up purchases.
King of Icefield / Alliance Championship: Coordinate spending with your alliance for mutual milestone rewards.
Hero Release Events (Flame and Fang, Gina’s Revenge): Set realistic goals (e.g., 2-star hero) and focus spending on core heroes only. Avoid chasing every new hero.
Alliance & Festival Events: Use event currencies on gear mats, shards, and crystals. Concentrate spending during tiered top-up milestones for maximum bonus.
🔑 Bottom Line
Engage actively in all events—even free participation yields big rewards.
Spend selectively on high-yield events and offers (Tundra Adventure, Frosty Fortune, Mia’s Fortune, etc.).
Avoid spreading your budget too thin; focus on one or two lucrative events per cycle.
Smart event spending multiplies your progress far more than random purchases.
🎨 7. Cosmetics and Stat Bonuses – Are They Worth It?
Whiteout Survival offers lots of cosmetic items—city skins, march skins, avatar frames, nameplates, decorations—that often grant small stat bonuses. For low spenders, it’s key to know which are worth chasing and which aren’t.
City Skins (Furnace Skins)
Change your base’s appearance and sometimes grant troop-wide stats (e.g., +2% Troop Attack from Fishing Tournament skins).
Low spender advice: Skins are luxury items. Stat boosts are permanent but minor and usually cost-heavy to obtain (high event ranks or paid packs).
If you get a skin as a bonus while buying other useful packs, great—otherwise, don’t spend solely for skins.
Multiple skins can stack over time, but this takes many events. Treat skins as a nice bonus, not a priority.
March Skins
Alter troop appearance and sometimes provide niche bonuses like +5% March Speed against beasts (PvE).
Generally, they don’t boost combat power significantly.
Low spenders: Don’t buy march skins—unlock them through events if possible. Only consider if they offer notable troop attack or health boosts and are easily accessible.
Avatar Frames & Nameplates
Frames sometimes give tiny bonuses (e.g., +2% Troop Defense); nameplates usually have no stat effect.
Advice: Equip free frames for small boosts but don’t spend money aiming for them. Temporary frames aren’t worth it. Nameplates are purely cosmetic; skip unless you want vanity and have extra funds.
Daybreak Island Decorations
Decorations provide minor buffs like Prosperity bonuses and small troop stat boosts.
They often require heavy investment for modest returns.
Low spenders: Use free decoration coins on functional buffs, not pure cosmetics. Avoid overspending—meet the minimum Prosperity needed for upgrades and move on.
Money is better spent on gear or research upgrades.
Stat Comparison: Cosmetics vs. Core Upgrades
For example, a city skin’s +2% attack is roughly what upgrading a Chief Gear charm or doing a combat research step can achieve—and gear or research usually costs less or yields more overall benefit.
Cosmetics stack with gear and research boosts but are the “icing on the cake,” not the main source of power.
When to Consider Cosmetics
Only after you’ve covered essential gear, heroes, and speed-ups.
Some low spenders pick one cosmetic as a morale boost or for fun—totally fine if it keeps you engaged.
From an efficiency perspective, cosmetics are lowest priority for spending.
Summary Table of Cosmetic Bonuses & Priority
| Cosmetic Item | Typical Stat Bonus | Low Spender Priority |
|---|---|---|
| Permanent City Skin | ~+2% Troop Attack or HP | Medium-Low — pursue only if cheap/free |
| Permanent March Skin | +5% PvE March Speed (example) | Low — mostly convenience, not combat power |
| Avatar Frame | +1-2% Troop Defense | Low — equip free ones, don’t buy |
| Nameplate | Usually None | None — purely cosmetic |
| Daybreak Decorations | Small buffs (HP, attack, etc.) | Low — use free/minimal spending only |
Final Advice
Focus your money on core upgrades—gear, research, heroes—where you get real power gains. Collect cosmetics as they come, enjoy their style and small bonuses, but don’t sacrifice meaningful progress for them. If you get a cosmetic, great—just make sure it’s not at the expense of a significant upgrade.
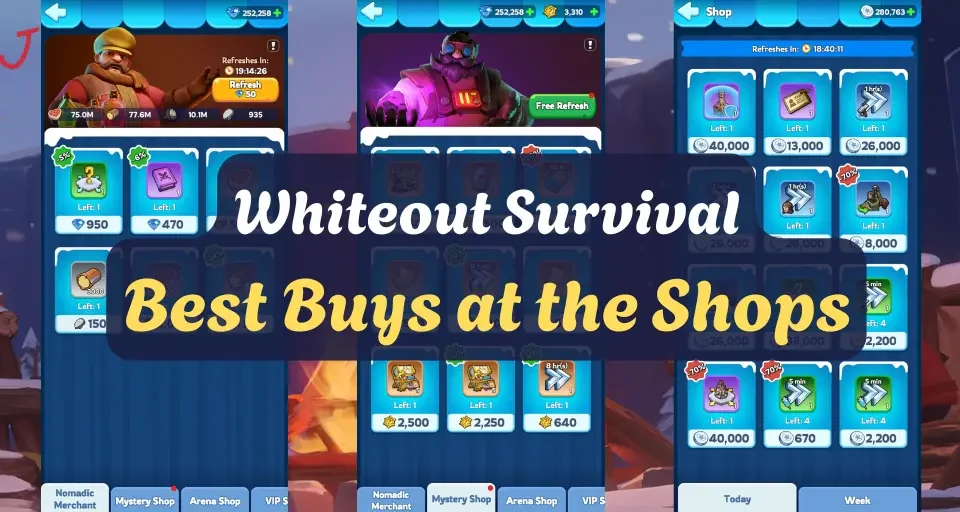
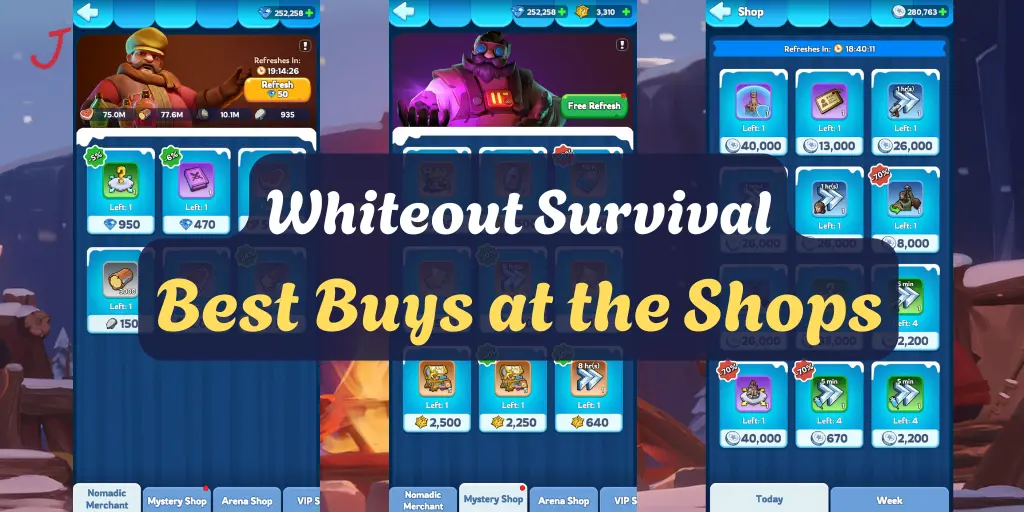
🛒 8. Shop Guide: What to Buy (and What to Avoid)
Shop Name | Best Buys | What to Avoid | When to Buy vs. Save |
Nomadic Merchant | Advanced Teleport – top priority (trade surplus resources for this valuable teleport). Discounted resource trades – worth picking up when available, as they offer clean, guaranteed profit. | Buying speedups in early game (wastes precious resources). Spending gems on Merchant deals (not worth it for low spenders). | Grab Advanced Teleport whenever it appears – it’s rare and crucial for relocation. Standard (non-discounted) resource trades are perfectly fine, since you’re just converting one resource to another at the game’s built-in ratio – no actual value is lost. Doing these trades also increases your chances of teleport offers showing up again in the shop.
|
Mystery Shop | Gear Widgets (for Mythic hero gear upgrades) are the best use of your daily badges. | Mythic Hero Shards – too costly for the benefit, so low spenders should avoid buying shards here. Also skip any other low-impact items (focus your badges on gear materials instead). | Use your daily Mystery Badges (you earn ~80/day from daily missions) to buy a widget whenever possible. Don’t hoard badges hoping for shards – consistently upgrading gear with widgets will benefit you more in the long run. |
Arena Shop | Custom Mythic Hero Gear Chest – the best value item, letting you choose a Mythic gear piece. It’s the only free/low-spender way to obtain Mythic hero gear, so prioritize this. | Spending Arena Tokens on lesser items (like lower-tier gear, resources, etc.) – those can be earned elsewhere more easily. | Save up your Arena Tokens until you can afford a gear chest. It may take time, but it’s better to wait for this high-impact reward than to spend tokens immediately on smaller items. Once you have enough, grab the chest and start working on your Mythic gear set. |
VIP Shop | Stamina (to refill energy for hunts/events) and Advanced Teleports (when you need one quickly) are the only buys worth your gems here. | Most other items – e.g. resources, speedups, basic boosts – are over-priced for gems. Don’t use the VIP Shop for things you can get from free rewards or other shops. | Only buy from the VIP Shop on an as-needed basis. For example, grab a stamina pot if you need more hits in an event, or a teleport if you must relocate and have none. Otherwise, low spenders should save their gems – there’s no need to purchase something here every day. |
Alliance Championship | Polishing Solution – a rare material for enhancing Chief Gear (hard to obtain except from this event shop or the Crazy Joe event). Hardened Alloy is a secondary pick if you really need it (you get some from hunting beasts, so it’s less urgent). | Spending your championship coins on anything besides gear upgrade materials. Avoid buying common items or hero shards here – use this shop for the exclusive stuff that boosts your gear. | Each time the Alliance Championship event runs, prioritize buying a Polishing Solution once you have enough currency. If you have extra coins after securing a Polishing Solution (or if you’re flush with Solutions already), you can pick up Hardened Alloy. If you don’t have enough coins for a Solution, hold onto them for the next round rather than spending on low-value items (the currency should carry over). |
Foundry Shop | Design Plans – crucial for unlocking or crafting higher-tier Chief Gear, and the Foundry is the main source for them | Wasting Foundry (Arsenal) Tokens on things like speedups, resources, or easily-farmable items. These tokens are limited, so don’t spend them on trivialities that don’t advance your gear or charms. | Save up your Foundry tokens across events until you can afford a Design Plan – don’t fritter tokens on small items in the meantime. Always get the Design Plan first when possible. With any leftover tokens, you can consider charm upgrade pages or additional gear materials (Alloy/Solution) if you truly need them. It’s often wise to keep some reserve tokens since Foundry events can vary in rewards. |
Skin Shop | Permanent City Skins or March Skins that give useful stat bonuses (e.g. troop attack, defense, or resource boosts). These provide lasting benefits and all their bonuses stack (multiple skins = combined buffs), so each one helps your account long-term. | Purely cosmetic purchases. Skip fancy frames, temporary skins, or decorations that don’t give meaningful buffs until you’ve bought the important skins. Low spenders should not waste Skin Tokens on vanity items before getting growth/combat perks. | Be patient and save your Skin Tokens from daily missions/events until you can afford a high-value skin with a good bonus. It takes a while to accumulate enough tokens, so plan for the skin you want most and buy it when you have enough. (For example, if there’s a city skin that boosts your troop stats, it’s worth waiting to get that.) After securing your top-priority skins, you can later spend tokens on smaller cosmetic extras if you have excess, but always get the big benefit items first. |
Labyrinth Shop | Mythic Hero Shards – very cost-effective here, great for awakening or upgrading your heroes. Also grab any rare materials like Mithril (for crafting legendary gear, once your server unlocks it) and Fire Crystals (for Fire Age research/T10 troops) as soon as they become available to you. | Cosmetic island decorations and speedups – these are poor value for your Glowstone currency. (Most everything else in the Labyrinth shop is a good deal, so focus on those and ignore decorative fluff.) | Spend your Glowstone (Labyrinth currency) on high-impact items each week. Early on, use it to boost your account immediately with hero shards (and any gear upgrades available) rather than hoarding. As you get closer to late-game needs, start saving enough Glowstone to buy Mithril or Fire Crystals when your server’s progress unlocks them. Generally, don’t let Glowstone pile up unused – invest it in something that improves your roster or gear every refresh. |
Gem Shop | Almost nothing – it’s rarely worth it for low spenders to buy items directly with gems here. The only exception might be a cheap Server Megaphone for state chat coordination (if you really need one). | Essentially everything else. Do not spend gems on resources, speedups, or basic items in the shop – the gem price is not justified by the gain. (Those items can be earned through gameplay or bought cheaper via other shops/events.) | Generally never – avoid using the Gem Shop under normal circumstances. Your gems have far better use in special events like the Lucky Wheel, where the same gems can yield far greater rewards (e.g. lots of hero shards or other bonuses). Save your gems for those high-value events. Only resort to the Gem Shop in true emergencies – for example, if you urgently need a teleport or shield and have no other source, or that megaphone for communication. |
Whiteout Survival Low to Mid Spender's Guide: Final Thoughts
For low spenders—whether you’re investing $50–$400 total or about $5–$50 per month—this guide shows how to compete effectively by making every dollar and in-game opportunity count. The golden rule is simple: spend on upgrades that boost your strength long-term and avoid fleeting, short-term traps. For instance, a $5 pack of speed-ups might give quick gratification, but that same $5 spent on Chief Gear materials or a well-timed event pass can pay off for months. Patience is key—waiting for the right event or deal can easily double or triple your value.
Stay tuned to community tips and game updates, as shifts in balance or new features might introduce fresh “evergreen” priorities. However, the core strategy remains the same: focus on efficient growth, smart spending, and maintaining balance to thrive in Whiteout Survival’s icy challenges—without overspending.
Good luck out there, Chief, and keep warm!
